

How to Use a Veneer Dryer Correctly?
In the plywood and veneer manufacturing industry, the veneer dryer is the heart of the production line. Its correct operation directly determines the quality of the veneer, the energy consumption, and the service life of the equipment. Many factories suffer from warping, cracking, uneven drying, or even frequent breakdowns—not because the machine is poor, but because it is not used properly. At Shine Machinery, we design our vertical veneer dryers (flipping‑plate type) to be intelligent and user‑friendly, but even the best equipment needs the right operating habits. This guide walks you through the professional way to run a veneer dryer, helping you achieve flat, high‑quality veneers at the lowest possible cost.
1. Pre‑Operation Checks: Build a Solid Foundation
Before pressing the start button, a thorough check is essential. This is not just about safety; it is about preventing hours of downtime later.
Foundation and transmission: Ensure the machine is installed on a level base with deviation ≤±3mm. Check chain tension, reducer oil level, and tighten all bolts. Remove any wood chips or debris from the infeed table, flipping plates, and roller gaps to prevent jamming.
Electrical and heat source: Release emergency stops, confirm all switches are off before powering on. For steam systems, open the steam trap to drain condensate. For thermal oil systems, circulate oil and heat it to the set value (usually 160–200°C) before feeding veneers. For biomass or hot‑air furnaces, inspect the burner, dust removal system, and fan rotation direction.
Sensor calibration: Verify temperature, humidity, and moisture probes. Re‑calibrate after replacing any sensor.
⚠️ Golden rule: Never supply heat without running the circulation fans first. Start the fans, then introduce heat. Otherwise, local overheating will damage the flipping plates and seals.
2. Preheating: Patience Pays Off
Do not rush to load wet veneers into a cold machine. Preheating ensures the entire drying chamber reaches a stable temperature and avoids thermal shock.
Start the fans and gradually raise the temperature to the process setpoint.
This prevents condensation when cold, wet veneers enter, which could cause veneers to stick to the plates.
For vertical (flipping‑plate) dryers, preheat zone by zone to keep temperature variation within 3°C across all layers.
3. Loading: Half the Success Lies in How You Feed
Incorrect loading is the number‑one cause of poor drying quality. Follow these steps:
Sort by specification: Only dry veneers of the same species and thickness in one batch (our machines handle 0.8–8mm, but mixing thick and thin causes thin ones to scorch while thick ones remain wet).
Pre‑treat the veneers: Cut neatly after peeling, remove curled edges, and shake off surface water. If initial moisture exceeds 80%, pre‑dry naturally to reduce the load on the main dryer.
Correct orientation: Place veneers perpendicular (90°) to the conveying direction. No overlapping, no skewing. On flipping‑plate dryers, lay them gently and evenly to allow hot air to penetrate.
Continuous, steady feeding: Maintain a constant infeed rhythm. Avoid “feast or famine” feeding, as intermittent loading causes temperature fluctuations and doubles reject rates.
4. In‑Operation Monitoring: Watch Four Key Parameters
Once running, your focus should be on balancing temperature, speed, air volume, and moisture content.
Temperature curve: We recommend a constant range of 80–100°C for low‑temperature slow drying. This prevents internal stress, warping, and cracking. Thick veneers (>3mm) need even slower heating to avoid a dry crust with a wet core. Never “blast heat” to chase output—high‑temperature quick baking equals cracks and brittleness.
Conveying speed: Link speed directly to veneer thickness. Thin sheets (0.8–1.5mm) move faster; thick sheets (3–8mm) move slower. Use the inverter to adjust speed; do not rely on blocking material to control temperature.
Humidity exhaust and air volume: Adjust exhaust dampers based on humidity sensors. Do not keep them fully closed (traps moisture) or fully open (wastes heat). Clean air ducts, heat‑exchanger fins, and filters weekly—1mm of dust can cut heat efficiency by 10%.
Moisture content closed‑loop: Target final moisture of 8%–12% (ideal for plywood gluing). Do not judge by surface feel; check the core. Over‑drying below 6% makes veneers brittle. If equipped with an online moisture meter, link it to the PLC for auto‑speed control. Otherwise, manually sample 3–5 times per shift.
Common issues and quick fixes:
Problem | Likely Cause | Solution |
|---|---|---|
Cracking/curling | Inlet temp too high, heating too fast | Lower temp, reduce speed |
Uneven drying, wet spots | Overlapping, short‑circuited airflow, poor exhaust | Rearrange load, adjust dampers, clean heat exchanger |
Warping after exit | Insufficient cooling | Extend cooling zone; exit temp should be <40°C |
Jamming/misalignment | Crooked feeding, plate misalignment | Emergency stop, realign, check tracking |
Slow heating | Exhaust open, steam with water | Close exhaust, drain condensate |
5. Unloading and Stacking: Don’t Spoil It at the Finish Line
Cool before stacking: Hot veneers stacked directly will continue to dry internally, warp, and may even self‑ignite (especially pine). Let them pass through the cooling zone to near room temperature.
Spot‑check moisture: Sample multiple points from a batch. Separate over‑dry or over‑wet sheets.
Proper stacking: Use wooden spacers at the bottom to lift stacks off the damp floor. Cover with dust‑proof and moisture‑proof sheets. In high‑humidity workshops, veneers can re‑absorb moisture within hours, affecting later gluing.
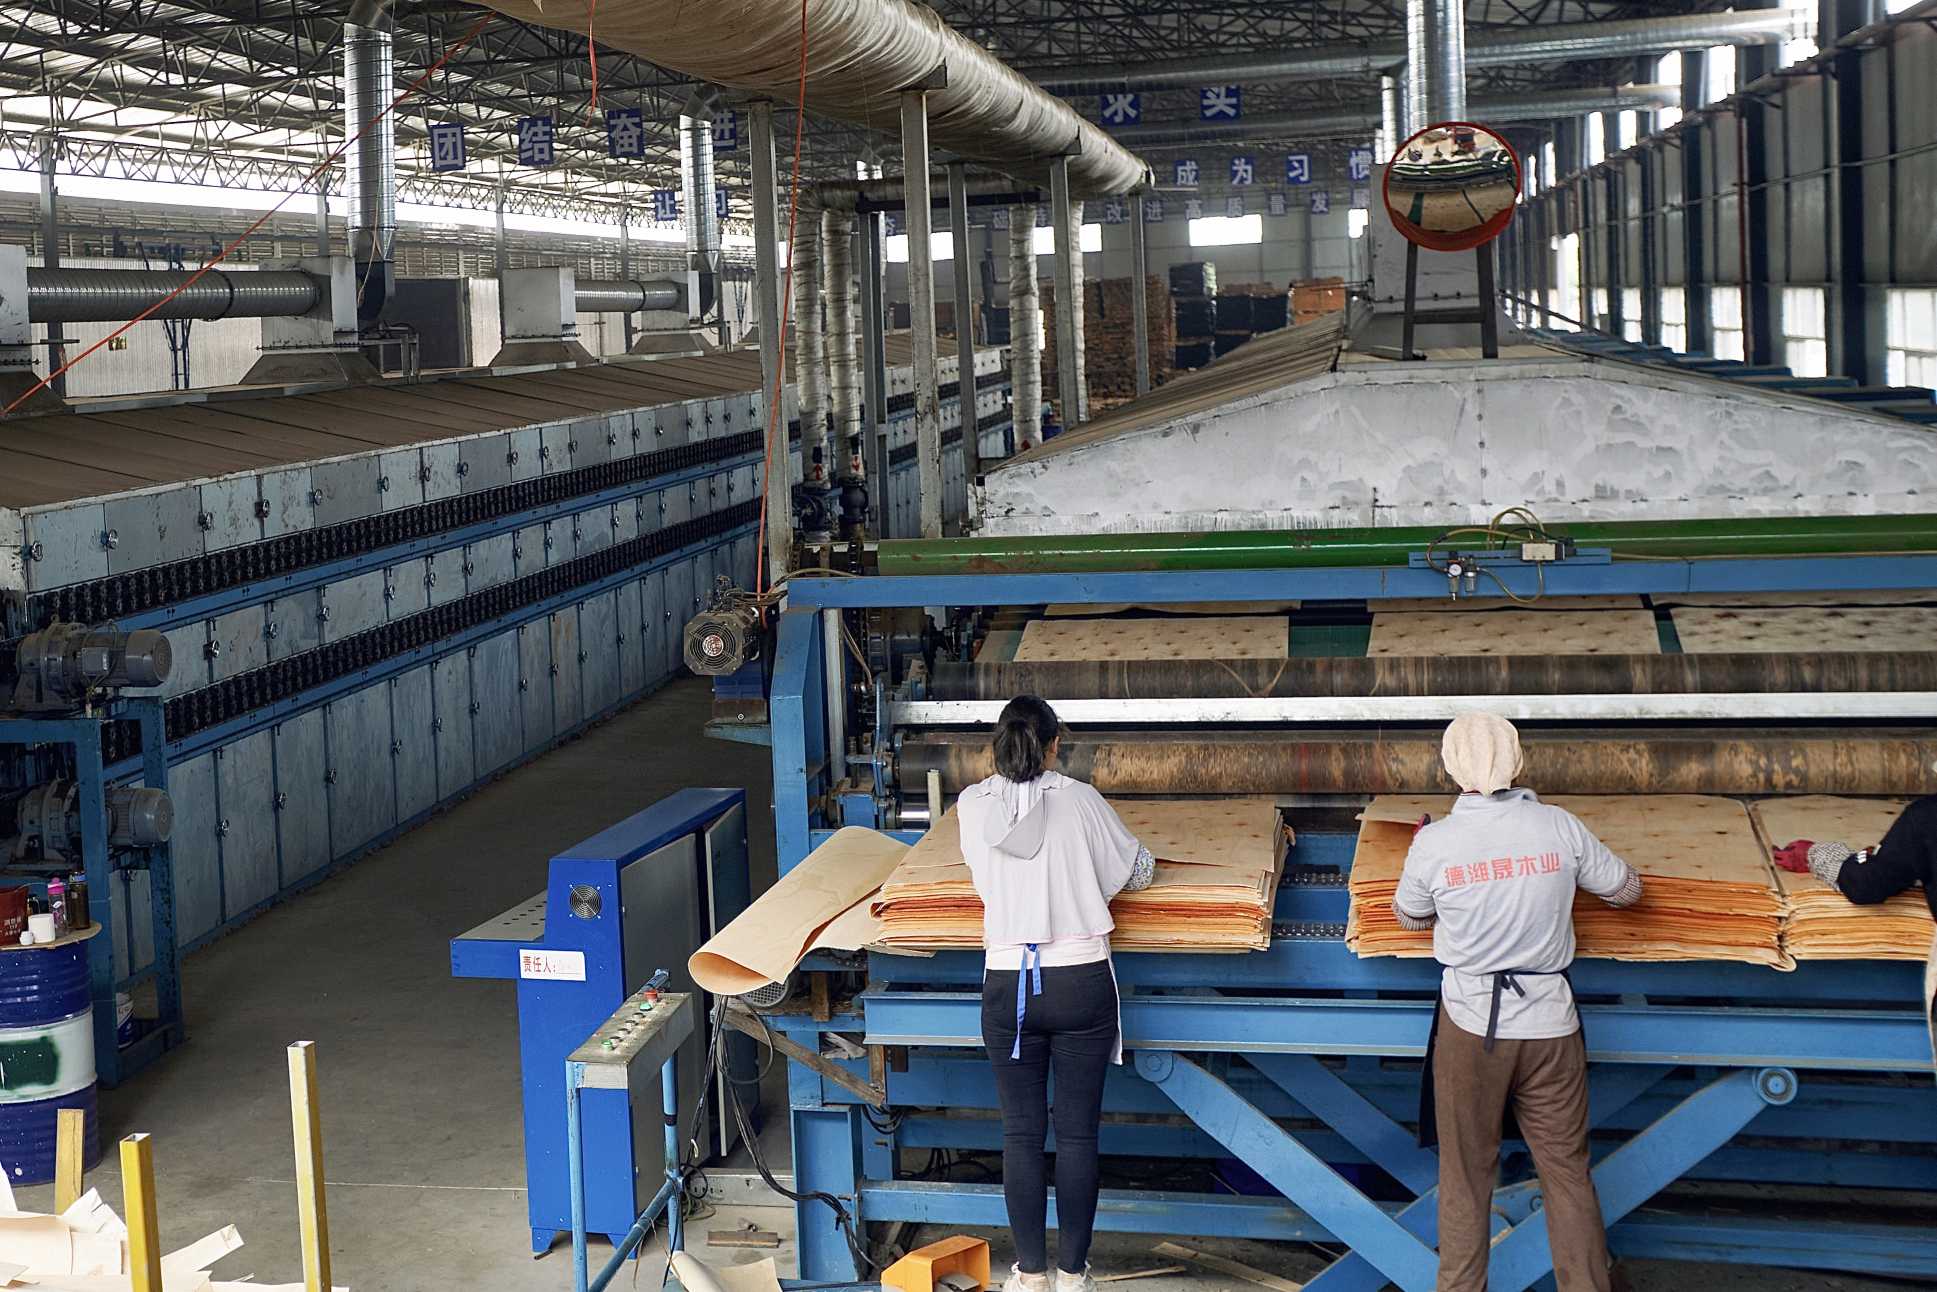
6. Shutdown: Wrong Sequence Shortens Equipment Life
A correct shutdown protects your investment:
Stop feeding new veneers.
Wait until all veneers inside have exited.
Turn off the heat source (burner/steam/thermal oil).
Keep fans running for 15–30 minutes to blow away residual heat.
When internal temperature drops below 60°C, stop fans and conveyor.
Cut main power and hang a warning tag.
❌ Never pull the main power switch directly while the machine is hot. Trapped heat will bake belts, seals, and wiring.
In case of sudden power failure: first close heat and fuel valves. After power returns, check for jams and alarms before restarting.
7. Maintenance Schedule: Turn Care into Habit
A well‑maintained dryer runs efficiently for 10–15 years. Post this schedule in your workshop:
Daily: Clean flipping plates/mesh belts, empty dust collectors. Check bearing temperature, unusual noises, belt tension. Review PLC alarm logs.
Weekly: Apply high‑temperature grease (rated 300°C) to fan bearings. Oil chains with high‑temp chain oil. Calibrate moisture meter against lab samples. Inspect door seals and insulation.
Monthly: Deep‑clean heat‑exchanger fins. Check reducer oil level, top up or change. Inspect cooling fans and ducts for blockage.
Quarterly: Full internal cleanup. Clean burner nozzles and ignition pins. Test insulation of inverters and motors.
Yearly: Change gearbox oil. Pressure‑test steam/thermal oil pipes. Inventory and replace wearing parts (belts, seals, sensors).
8. Safety Red Lines: Non‑Negotiable
Never put hands near flipping plates, chains, or rollers while running.
To clear a jam: Emergency stop → Power off → Lockout/Tagout (LOTO) → Confirm complete standstill before reaching in.
Keep the workshop ventilated; run dust collection continuously.
Keep a 3‑meter clear zone around the dryer, free of veneer piles, wood chips, or oil.
If smoke, strange odor, or abnormal sound occurs, cut the heat source first, then investigate. Never repair while the machine is moving.
Conclusion
Using a veneer dryer correctly is not complicated—it is a discipline. The formula is simple: same‑spec feeding, perpendicular and even loading, low‑temperature slow drying, steady speed, moisture closed‑loop, cool‑before‑stacking, and scheduled maintenance. Follow these steps, and your Shine Machinery vertical veneer dryer will deliver flat, high‑quality veneers with minimal energy use and a service life that exceeds 10 years.
At Shine Machinery, we do not just sell machines; we provide full‑lifecycle support. From installation and commissioning to operator training and spare parts, our team ensures you get the most from your investment. Contact us today to learn more about our vertical veneer dryers and how they can transform your production line.