

Drying Hardwood Veneer: 8 Key Precautions
In the global wood processing industry, hardwood veneer holds a special place. From oak and walnut to beech, cherry, and maple, these species command premium prices in furniture, flooring, and decorative paneling. But here is the hard truth: drying hardwood veneer is nothing like drying poplar or pine. Get it wrong by even a few degrees, and you will end up with cracked edges, discolored surfaces, oily patches, and warped sheets that no furniture factory will accept.
If you are running a veneer drying machine or advising clients on drying solutions, understanding the unique behavior of hardwood veneer is critical. This article breaks down the eight most important precautions for drying hardwood veneer—covering temperature curves, humidity control, loading methods, species-specific tips, and quality standards. Whether you are a factory owner, a plant manager, or an equipment supplier, this guide will help you protect the value of every sheet that goes through your wood veneer dryer.
Why Hardwood Veneer Is So Much Harder to Dry
Before diving into the precautions, it is worth understanding what makes hardwood veneer unforgiving. The challenges come down to four physical traits:
First, density. Most hardwoods have an air-dry density between 0.6 and 0.9 g/cm³, sometimes higher. This means water migration channels inside the wood are narrow and slow. Moisture from the core takes much longer to reach the surface compared to fast-drying softwoods.
Second, extractives. Many hardwoods contain oils, tannins, and natural resins. Walnut and oak are prime examples. Under high heat, these compounds migrate to the surface or oxidize, causing stains, oily patches, and poor glue adhesion in later lamination.
Third, fiber stiffness. Hardwood fibers are rigid and brittle. As the veneer dries and shrinks, internal stress builds up quickly. Without careful control, this stress shows up as end splits, surface checks, and severe warping.
Fourth, thinness. A large portion of hardwood veneer is peeled or sliced very thin—often 0.5 to 0.8 mm for decorative face veneers. At this thickness, there is almost no margin for error. A few degrees too high, and the sheet is burnt or too brittle to handle.
These four factors explain why a wood veneer dryer configured for softwood will almost certainly damage hardwood if you simply press "start" with the same settings.
Precaution 1: Lower Temperatures, Slower Ramp-Up
The single most common mistake in hardwood veneer drying is running temperatures that are too high. Hardwood does not need—and cannot tolerate—the aggressive heat curves used for poplar or eucalyptus.
As a general rule, keep your maximum drying temperature for hardwood below 60°C (140°F). For color-sensitive species like cherry or walnut, stay below 50°C (122°F). The ramp-up rate should not exceed 1.5 to 2°C per hour. Softwoods can handle 3°C per hour, but hardwood needs patience.
Here is a quick reference for common hardwood species:
Oak and Ash: Preheat at 38–42°C, main drying at 48–55°C, equalizing at 45–50°C.
Beech and Birch: Preheat at 40–45°C, main drying at 50–58°C, equalizing at 48–52°C. For sheets thinner than 0.8 mm, reduce the main drying temperature by another 5°C.
Walnut and Cherry: Preheat at 35–40°C, main drying at 45–52°C, equalizing at 42–48°C. These species demand the lowest temperatures to prevent color shift.
Maple and Ash: Preheat at 40–45°C, main drying at 50–58°C, equalizing at 48–52°C. Pay close attention to end sealing to prevent splits.
The principle is simple: slow temperature rise prevents surface hardening. When the outside of the veneer dries and hardens before the inside is ready, moisture gets trapped. The result is a "case-hardened" sheet that looks dry but will warp or mold later.
Precaution 2: Keep Humidity High in the Early Stages
Hardwood veneer needs a humid start. The biggest mistake operators make is opening exhaust fans too early. As soon as you force out humidity, the veneer surface begins to lose moisture rapidly. The core cannot keep up. End splits and surface checks appear within the first hour.
For hardwood, follow this humidity schedule:
Preheating stage: Maintain 65% to 75% relative humidity. This keeps the surface open and receptive, allowing moisture from the core to migrate outward continuously.
Early main drying (moisture content dropping from 30% to 20%): Hold humidity at 50% to 60%. This is the most critical window. Reduce humidity slowly, giving internal water time to travel.
Late main drying (20% down to target): You can drop to 35%–45% and increase exhaust frequency.
Equalizing stage: Hold at 30%–40% RH with stable temperature for at least 30 to 60 minutes.
Practical tip: for the first two hours of a hardwood drying cycle, keep exhaust fans off entirely. Rely on minimal natural ventilation. After that, use intermittent exhaust—10 minutes on, 20 minutes off—rather than continuous extraction. A quality veneer drying machine should allow you to program these humidity steps automatically. If your current equipment only has manual dampers, assign one worker to manage the schedule strictly for hardwood batches.
Precaution 3: Load Smart—Hardwood Is Less Forgiving
How you load the dryer matters as much as the temperature curve. Hardwood veneer demands more discipline:
Allow equalization time after peeling. Freshly peeled hardwood veneer should sit flat for 4 to 6 hours in a shaded area before loading. Softwood only needs 2 to 3 hours. This extra time lets moisture redistribute within each sheet, reducing internal stress before drying even begins.
Sort strictly by thickness. Hardwood veneer is often used for high-end decorative panels where thickness tolerance is tight. Keep variation within ±0.15 mm per batch. Mixing thick and thin sheets means the thin ones will scorch before the thick ones dry.
Align ends perfectly. Use a mechanical stop or guide rail so every sheet lines up at the leading edge. Hardwood end grain loses moisture fastest. If ends are staggered, some will dry and crack while others are still protected.
Cover thin sheets. For veneer under 0.8 mm, place a breathable mesh or perforated plate over the top layer. This diffuses direct hot air and prevents local over-drying.
Use spacers between layers. Hardwood density means air does not flow through a stack easily. Place 5 mm wooden strips between each layer to create air channels. This single step dramatically improves drying uniformity.
Do not overload. Reduce each batch by 10% to 15% compared to softwood capacity. The extra space improves airflow, reduces bottom-layer pressure, and prevents compression marks on dense hardwood sheets.
Precaution 4: Species-Specific Rules You Cannot Ignore
Every hardwood species has its own personality. Here are the critical notes for the most common ones:
Oak (Red and White): High tannin content means temperatures above 55°C combined with low humidity will cause oxidation and gray discoloration. Keep below 50°C until moisture content drops under 25%. Wide vessels also make oak prone to "collapse" where surface cells shrink permanently. High early-stage humidity prevents this.
Walnut: Rich in natural oils. Above 50°C, oils migrate to the surface, creating spots that repel adhesive during lamination. Keep the entire cycle at 45–50°C and increase air exchange (not dehumidification—actual fresh air intake) to carry away oil vapors.
Cherry: Extremely temperature-sensitive. Above 52°C, the heartwood develops a reddish-brown cast that differs from its natural warm tone. Many buyers reject this as a defect. Dry cherry at 45–50°C maximum and extend cycle time to 1.5 times that of softwood.
Beech and Birch: Often processed as very thin decorative veneers (0.5–0.6 mm). Highly prone to warping. Always use restraining grids or weights, and seal the dried batch immediately after cooling to prevent curl-back.
Maple: Prone to mineral streaks and color variation. While not directly caused by drying, high heat amplifies contrast. Keep temperatures moderate and avoid prolonged high-humidity periods that can promote surface mold on figure-heavy cuts.
Precaution 5: The "Three Nevers" of Hardwood Drying
If your operators remember nothing else, make them remember these three rules:
Never rush the temperature. More than 2°C per hour ramp-up is asking for case hardening and internal checking. Slow is fast—a longer cycle at the right temperature produces usable veneer. A short cycle at high heat produces scrap.
Never force early dehumidification. Exhaust fans should stay off for the first two hours. After that, use intermittent cycles. Continuous extraction during early drying is the #1 cause of end splits in hardwood veneer.
Never overload the chamber. A wood veneer dryer packed to maximum capacity with hardwood will have poor air penetration, uneven drying, and bottom-layer compression damage. Reduce load by 10%–15% and accept the slightly longer cycle. Your yield will improve dramatically.
Precaution 6: Post-Drying Handling Is Part of the Process
Drying does not end when the machine stops. Hardwood veneer is especially vulnerable in the first few hours after discharge:
Cool-down period: Spread sheets on a flat, ventilated surface for 15 to 30 minutes. Do not stack hot veneer. Surface temperature must be within 10°C of room temperature before stacking to prevent condensation and hidden moisture regain.
Weighting: Immediately place flat weights or restraining boards on top of the stack. Hardwood "remembers" its dried shape. Without restraint, sheets will curl within 24 hours.
Sealing: For thin decorative hardwood veneer, wrap the entire stack in plastic film or use vacuum packaging the same day. Hardwood absorbs ambient moisture faster than softwood due to its open cell structure.
Storage environment: Maintain 40%–60% relative humidity in the storage area. Label each batch with drying date and final moisture content. Use first-in, first-out rotation.
Precaution 7: Choose Equipment Built for Hardwood
Not every veneer drying machine is designed with hardwood in mind. When evaluating or recommending equipment, look for these features:
Multi-stage programmable controls that store separate recipes for each species. Operators should not be adjusting dampers by hand.
Uniform air distribution plates at each layer to prevent fast-track airflow that over-dries edges.
Gentle conveying or static tray systems that do not stress thin sheets.
Accurate humidity sensors calibrated for the 40%–75% RH range, with weekly verification.
Insulated chambers that hold temperature steady within ±2°C. Hardwood cannot tolerate thermal cycling.
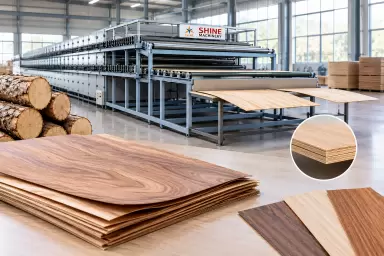
A semi-automatic wood veneer dryer with these capabilities will pay for itself quickly in hardwood operations—simply by reducing reject rates from typical levels of 15%–25% down to under 5%.
Conclusion: Slow Is Profitable
Drying hardwood veneer is not a race. It is a controlled process that respects the density, chemistry, and fiber structure of premium wood species. Lower temperatures, higher early humidity, slower ramp rates, careful loading, and disciplined post-drying handling—these are not optional extras. They are the difference between veneer that commands top dollar and veneer that gets downgraded to packing material.
For equipment manufacturers and suppliers, this is the message that resonates with serious buyers: a dryer that handles hardwood correctly is not just a machine. It is a profit protector. When you help a customer dry oak, walnut, or cherry without cracks, without color shift, and without warping, you are protecting margins that can be three to five times higher than softwood products.
If you are exploring a new veneer drying machine for hardwood production, or looking to optimize an existing line, our team can help you configure the right solution. From species-specific drying recipes to chamber layout and after-sales support, we understand what hardwood demands—and how to deliver it. Contact us today to discuss your application.