

Veneer Shrinkage After Drying: What to Expect
In the plywood and veneer manufacturing industry, one of the most frequently asked questions by both new and experienced operators is: “How much will my veneer shrink after it goes through the dryer?” This is not a trivial concern. Shrinkage directly affects peeling thickness settings, trimming allowances, glue consumption, and final product dimensions. Misjudging shrinkage can lead to costly overruns, excessive waste, or panels that fail to meet specifications.
At Shine Machinery, we design and build vertical veneer dryers (flipping‑plate type) that help control the drying process with precision. But even the best dryer cannot change the fundamental properties of wood. Understanding veneer shrinkage is essential for anyone involved in plywood production. This article explains the science, the real‑world numbers, and how to use this knowledge to improve your yield and quality.
1. The Science: Wood Shrinks Differently in Every Direction
Wood only begins to shrink when its moisture content drops below the fiber saturation point (FSP), which is typically around 30%. Above this point, water fills the cell cavities but does not contribute to size changes. Below FSP, water bound in the cell walls evaporates, causing the wood to contract.
Crucially, shrinkage is not uniform. It varies dramatically by direction:
Longitudinal (along the grain): Only 0.1%–0.2%. For all practical purposes, the length of a veneer sheet remains unchanged after drying.
Radial (perpendicular to growth rings): About 3%–6%. This affects width to a moderate degree.
Tangential (parallel to growth rings): The highest, at 6%–12%. This is why veneers often curl, cup, or split along the width.
Because rotary‑cut veneer is essentially a continuous tangential sheet, the width direction experiences the most noticeable shrinkage. The length stays almost constant, which is why plywood layup lines rarely worry about length variation.
2. Real‑World Shrinkage Figures for Dried Veneer
When we talk about “shrinkage” in a production setting, we usually refer to two metrics: dimensional (area) shrinkage and thickness shrinkage.
Based on industry data and our own factory tests, here is what you can expect when drying veneer from a high initial moisture content (80%–120%) down to a final target of 8%–12%:
Overall dimensional shrinkage (width × length projected area): Typically 4%–8%, with most species falling in the 5%–7% range.
Thickness shrinkage: Often more pronounced than area shrinkage, usually 4%–10%. This is due to a combination of moisture loss and “spring‑back” of fibers that were compressed during peeling.
To give you a clearer picture, here is a quick reference table for common plywood species:
Species | Radial Shrinkage | Tangential Shrinkage | Remarks |
|---|---|---|---|
Poplar | 3%–5% | 6%–8% | Mild shrinkage; easy to dry |
Eucalyptus (plantation) | 5%–8% | 10%–12% | High shrinkage; requires low‑temp drying |
Pine / Larch | Slightly higher | Higher | Resinous; sticky; more variable |
3. Why Shrinkage Rates Vary Between Batches
Even within the same species, you may see different shrinkage results. Several factors come into play:
Initial Moisture Content (MC): Freshly peeled eucalyptus can exceed 120% MC, while poplar is often around 100%. The wetter the veneer, the more total shrinkage you’ll get.
Target Final MC: Drying to 6% MC will shrink the veneer about 1%–2% more than stopping at 12% MC.
Peeling Compression: During rotary cutting, a pressure bar compresses the wood fibers by about 10%. This “stored” compression is released during drying, adding to the measured shrinkage.
Drying Method:
Hot‑press (contact) drying: Higher thickness shrinkage but better flatness.
Mesh‑belt / convection drying: Slightly less shrinkage but higher risk of warping if not controlled.
Veneer Thickness: Thinner veneers (0.8–1.5 mm) tend to have a lower percentage shrinkage than thicker ones, but they are far more prone to edge curling and end cracking.
Important Note: Textbooks list shrinkage values for solid wood, not compressed veneer. Always verify with your own production data.
4. Production Tips: How to Use Shrinkage Knowledge
A. Set Peeling Thickness with Allowance
If your target dry veneer thickness is 1.0 mm, you cannot simply peel at 1.0 mm. You must account for:
Drying shrinkage (~5%)
Glue line absorption and thickness increase (2%–3%)
Hot‑press compression (10%–15%)
In practice, add 8%–12% to the target dry thickness. For 1.0 mm final, peel at approximately 1.08–1.12 mm.
B. Width and Length Trimming Margins
A 4%–8% width reduction means a 1270 mm wide veneer may come out of the dryer at only 1180–1220 mm. Always add 30–50 mm of trimming allowance on the width. This ensures that after drying and shrinkage, the veneer still covers the plywood panel core without gaps.
C. Special Care for Eucalyptus
Eucalyptus is notorious for high shrinkage and internal stress. If you dry it using the same high‑temperature profile as poplar, you risk end splits, honeycomb cracks, and drying losses of 15%–20%. The solution is low‑temperature slow drying—exactly the process our Shine Machinery vertical veneer dryer is engineered for. By maintaining a constant 80–100°C and gentle flipping, we minimize stress, reduce cracking, and keep shrinkage within predictable limits.
D. Measure, Don’t Guess
Establish a simple quality routine:
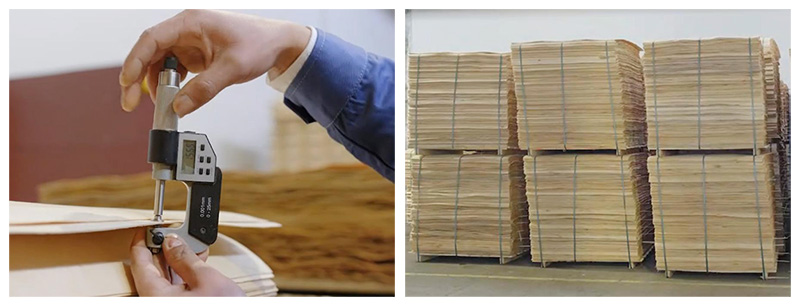
Measure veneer dimensions before drying (green).
Measure after drying (dry).
Calculate your actual shrinkage factor for each species and thickness.
Log this data and use it to adjust peeling settings.
Over time, you’ll build a reliable “shrinkage database” that eliminates guesswork and improves yield.
5. How Proper Drying Equipment Makes a Difference
While shrinkage is inevitable, its negative effects can be controlled. A well‑designed dryer does more than just remove water; it manages the rate of moisture removal to prevent stress buildup.
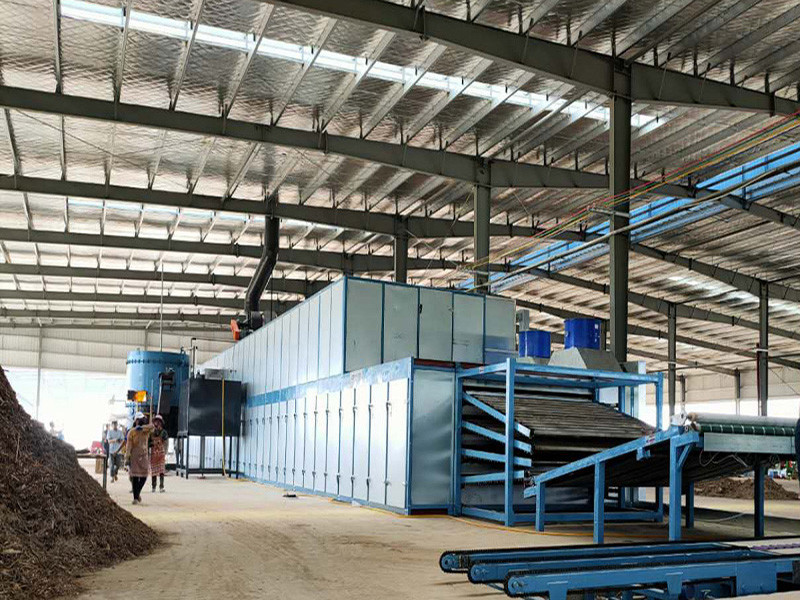
Our Shine Machinery Vertical Veneer Dryer (Flipping‑Plate Type) incorporates several features that directly address shrinkage‑related problems:
Low‑Temperature Slow Drying (80–100°C): Prevents surface case‑hardening and internal stress, reducing cracks and warping.
Uniform Heat Distribution: Advanced radiator arrays and smart airflow ensure every part of the veneer dries at the same rate, minimizing localized over‑shrinkage.
Gentle Flipping Action: The unique 180° flipping plates convey veneers with minimal drop and impact, avoiding mechanical damage that could exacerbate shrinkage‑induced defects.
AI‑Assisted Control: Optional moisture sensors and PLC auto‑speed adjustment keep final MC within ±1%, so shrinkage is consistent batch after batch.
By stabilizing the drying process, you not only reduce shrinkage‑related waste but also improve the flatness and strength of your veneers—directly boosting the quality of your plywood.
6. Conclusion
Veneer shrinkage after drying is a complex but manageable phenomenon. In summary:
Expect 4%–8% overall dimensional shrinkage and 4%–10% thickness shrinkage.
Poplar shrinks less; eucalyptus shrinks more.
Always add peeling and trimming allowances based on your own measured data.
Use low‑temperature, uniform drying to minimize defects.
At Shine Machinery, we combine deep industry knowledge with innovative drying technology to help you turn these challenges into competitive advantages. Whether you are processing poplar, eucalyptus, or mixed hardwoods, our vertical veneer dryers deliver the precision and reliability you need to maximize yield and profit.
Want to learn more about optimizing your veneer drying process? Contact our technical team today for a customized consultation and discover how Shine Machinery can help you achieve flatter, more dimensionally stable veneers with minimal waste.